Showing posts with label Easter decorating. Show all posts

Saturday, March 19, 2016

Gold Foil Easter Eggs


Over the last couple of years I have collected a few Easter bunnies that 
look like foil-wrapped chocolate.


They remind me of childhood Easter presents that included some chocolate 
and a bright pink skipping rope.
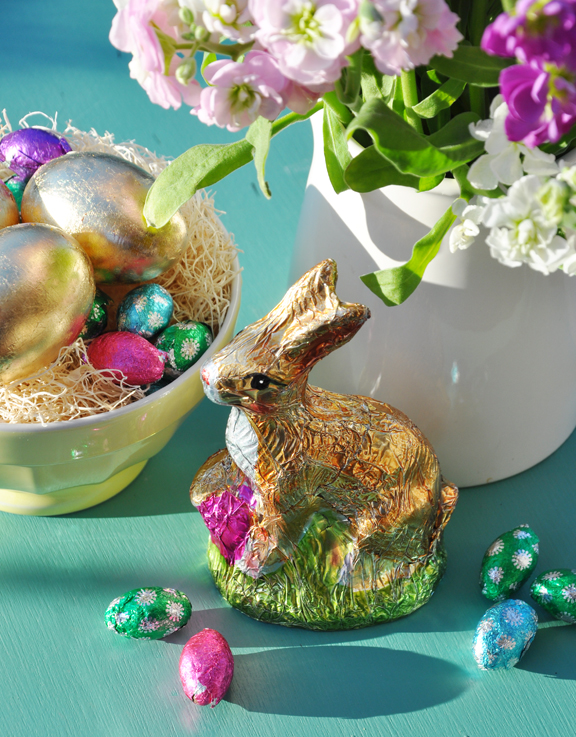

I found my Easter bunnies at Home Sense (I believe the American equivalent is Marshalls).


To create a pretty display this Easter, I thought it would be fun to make some faux foil-wrapped chocolate eggs to sit in a dish or basket alongside my rabbits.


If you ever wanted to try your hand at gold leafing, this is an easy project with 
which you can gain some experience.


To make these Easter Eggs you need:

• Plastic Eggs (I used an egg decorating kit that I bought at Walmart).

• A paint brush to apply the base coat paint, adhesive and sealer.

• A gold leaf kit (I found my kit at Michaels. You could also buy gold leafing materials separately if you prefer).

• A soft, wide brush to use to smooth the gold leaf.


Step 1: Apply a base coat of paint to your plastic egg. The purpose of the base coat is to fill an tiny gaps in the finished gold leaf. In the kit I purchased, this base coat was a burgundy color, but you could use any color you wish to have peak through the gold.

(Tip: I found it easiest to paint one half length of an egg at a time, let it dry, and then do the other half. Paper towel was a good, non-slip surface to work on).


Step 2: Apply the adhesive with a paint brush. Again, I did a half length of each egg at one time just to make things easier.

Step 3: Let the adhesive dry and become tacky. This glue will catch the thin gold leaf and attach it to the egg.


Step 4: Detach a sheet of gold leaf and the wax paper backing. Smooth the gold leaf over the surface of the egg with your fingers or a wide, soft brush.

Small pieces may break off as you do your smoothing. I used these smaller pieces to fill in any gaps in the gold leaf.


Step 5: Now all you have to do is apply a sealer coat to protect the gold leaf and your done!


Have fun decorating for Easter!

Thursday, April 2, 2015

Upcycled Easter Baskets


I am fully convinced that many decorative household items are given away because they are an ugly color and people can't see past that. 

Such was the case for the first Easter basket in this post. It looked ugly because, the decorative metal edging and chicken wire were painted black. 


To give the basket a new lease on life, I spray painted an Antique White. The basket came with three tin pots which I elected to leave just the way they were.


Add in some pansies and a rusted Easter bunny silhouette and suddenly the whole thing 
looks vintage and rather pretty.


This next project started with a lined wicker basket that I got at a charity shop for just under a dollar. Charity shops are a great place to find old ceramic containers and baskets that were once used for floral arrangements. 

The only thing the basket needed in this case was a few flowers.


To make this next arrangement I used:

• 3 small pots of mini-daffodils
• a small pot of green ivy
• sheet moss
• yellow ribbon
• bird's nest
• 3 candy or plastic eggs
• 2 birds
• hot glue and glue gun
• a couple of tooth picks


Directions:

Remove the daffodils from their plastic pots and place them in the wicker basket. 

Fill in where needed with a bit of trailing green ivy.

Cover any visible soil with pieces of the green sheet moss.

Chip on the first little bird to the basket handle. 

Use hot glue to attach the second bird and some eggs to the bird's nest. Using a couple of tooth picks, attach the nest to the moss.

Add a bow.


This final basket was again a sinister shade of black, so I spray painted it Antique White.


To make this next arrangement I used:
• wire basket
• a bottle (or glass vase)
• green sheet moss
• pink hydrangea flowers
• several pieces of green ivy
• pink ribbon

Directions:

Place a bottle in the centre of the wire basket (you could use a small glass vase just as well). Place large pieces of the green more sheet moss around the outside of the bottle to hold the bottle in place. The moss also helps to disguise the container/ bottle for your flowers.

Add the flowers, trailing pieces of ivy making sure they are in the water.

Tie up the basket with a pink bow.


Happy Easter!